How to Read Japanese Crochet Diagrams
If you’ve ever opened a Japanese crochet pattern book, you might have been greeted by beautiful charts filled with symbols instead of long written instructions. At first glance, it can feel a little intimidating — but once you understand the logic behind these diagrams, you’ll realize how clear and elegant they actually are.
Japanese crochet patterns use universal symbols to represent stitches. Once you learn what each symbol means and how to read the flow of the chart, you’ll be able to follow patterns from any country, even without reading a single word of Japanese. Let’s take it step by step.
🌸 Why Japanese Crochet Diagrams Are So Loved Worldwide
Japanese crochet books are admired for their clarity and precision. Instead of paragraphs of abbreviations like “ch 3, dc in next st,” they show the entire structure visually — every stitch, every round, every repeat.
The main advantages of crochet diagrams are:
Universal language: The symbols are standardized internationally. Once you learn them, you can read patterns from anywhere.
Visual clarity: You can see exactly how the pattern grows, which makes it easier to understand the design’s shape and flow.
Error prevention: It’s easier to spot mistakes early, since the chart shows how each stitch connects to the next.
Even if you’ve only worked from written patterns before, learning to read crochet charts is one of the most rewarding skills you can pick up as a crocheter.
🧵 Understanding Crochet Chart Symbols
Each stitch is represented by a simple symbol. Here are the most common ones you’ll encounter in Japanese crochet books:
| Symbol | Meaning | English Abbreviation |
|---|---|---|
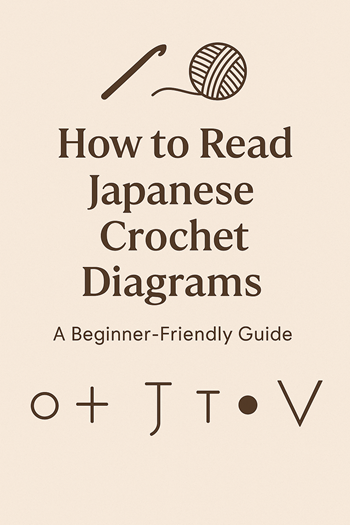
| ○ | Chain | ch |
| ⊥ or + | Single crochet | sc |
| T with one slash | Double crochet | dc |
| T with two slashes | Treble crochet | tr |
| Small filled dot | Slip stitch | sl st |
| V shape | Two stitches in same stitch (increase) | inc |
| ∧ or /\ | Two stitches joined together (decrease) | dec |
| Oval or long loop | Foundation chain | — |
You’ll usually find a “Stitch Key” (記號の説明) at the beginning or end of each book. This is your legend — keep it handy when working from Japanese charts.
💡 Tip: Print out a small reference sheet or tape it near your workspace when you start. It’s much easier to get used to symbols through repetition and quick visual recall.
🔄 How to Read the Direction of a Crochet Diagram
Understanding where to start and which direction to go is the key to following crochet charts correctly.
For flat projects (like scarves, sweaters, or coasters):
Rows are worked back and forth.
Odd-numbered rows are read right to left.
Even-numbered rows are read left to right.
Turning chains are often shown as a few circles at the start of each new row.
For motifs or circular projects (like doilies and flowers):
Work in the round, starting from the center.
Follow the chart counterclockwise, unless arrows indicate otherwise.
Each round is usually numbered (1, 2, 3, …) with small arrows showing the start point and direction.
📏 Common Notations and Numbers in Japanese Crochet Books
You’ll often see small notes, arrows, or numbers alongside diagrams. Here’s how to read them:
段 (dan) → means “row” or “round.”
目 (me) → refers to a “stitch.”
鎖 (kusari) → chain stitch.
引き抜き編み (hikinuki-ami) → slip stitch.
長編み (naga-ami) → double crochet.
細編み (hosoi-ami) → single crochet.
Next to the main diagram, there’s usually a schematic drawing showing finished measurements in centimeters. This helps you understand the final size and shape of the piece.
🪡 How to Start Reading Your First Diagram
When you pick a pattern, take a moment to study the entire diagram before you begin.
Locate the starting point — often marked by a small dot or number “1.”
Trace the direction arrows to see how the pattern grows.
Count the foundation chain circles (○) carefully.
Check for pattern repeats — sometimes enclosed by brackets or arrows.
Review special stitches or notes listed beside the diagram.
Start slowly and follow the chart one stitch at a time. As you gain confidence, you’ll begin to “read” the overall structure like a map.
💬 What Makes Japanese Patterns Different
Japanese crochet patterns are known for being minimalist. Most don’t include step-by-step text instructions — instead, they rely entirely on charts. But that simplicity is part of their beauty.
Here’s what to expect:
Visual-first layout: The diagram itself is the main instruction.
Clean design: Everything fits neatly on one or two pages — perfect for visual learners.
Precise scaling: Stitch placement is drawn accurately to represent the real proportions of your work.
Once you get used to this system, you may even find it easier to follow than written English patterns — especially for lace, motifs, and wearables.
🧡 Practice Projects to Try
If you’re new to reading diagrams, start with small, satisfying patterns such as:
A flower motif (great for understanding circular construction)
A simple coaster or square (helps practice row direction)
A granny motif (lets you see repeat sections clearly)
After that, try a Japanese crochet book with step-by-step photos or practice charts — they’re designed for beginners and help you connect the diagram to real stitches.
✨ Final Thoughts
Learning to read crochet diagrams may look challenging at first, but it opens an entire world of beautiful Japanese patterns — from delicate lacework to charming amigurumi.
Once you get comfortable, you’ll start recognizing patterns almost instinctively. Each symbol tells a story, each loop leads to another — and suddenly, you’re fluent in a universal crochet language.
So grab your favorite yarn, a hook, and one of those intricate Japanese charts — and let the symbols guide you, one quiet stitch at a time.
If you’d like to explore more universal crochet stitch symbols, the Craft Yarn Council’s Crochet Chart Standards offers an excellent visual reference for commonly used stitches worldwide. You can visit it here
